Want to turn your boring regular dehumidifier smart with 0 hardware tweaking and change from £30 of off the shelf smart products? Then read on!
Why bother?
We live in an old solid wall house in the UK, which means like many we rely on a dehumidifier in the damper months of the year. It’s a great bit of kit, of course keeping the damp at bay, but also makes heating more effective and allows us to dry fragile clothing indoors.
Straight away though, there were clear smart quality-of-life improvements that were glaring us in the face. It had a built in humidity target, but with the sensor on the machine, it was very optimistic and over 15% off from actual humidity levels. The tank would also fill at the worst times, beeping endlessly until we sorted. So I set out to achieve:
Precise humidity targets, using an external sensor.
Notifications when the tank is nearly full – with the choice to either get notified straight away, or when our toddler isn’t around.
Warnings, and eventually automatic switch off if the bathroom window has been left open.
And finally, automatic on and off around our toddler’s bedtime.
I’ll show below how we’ve done this, but first I should mention that this only works with models that return to their previous state when switched off and on at the wall. If yours requires an extra button press to start, this won’t work.
Hardware
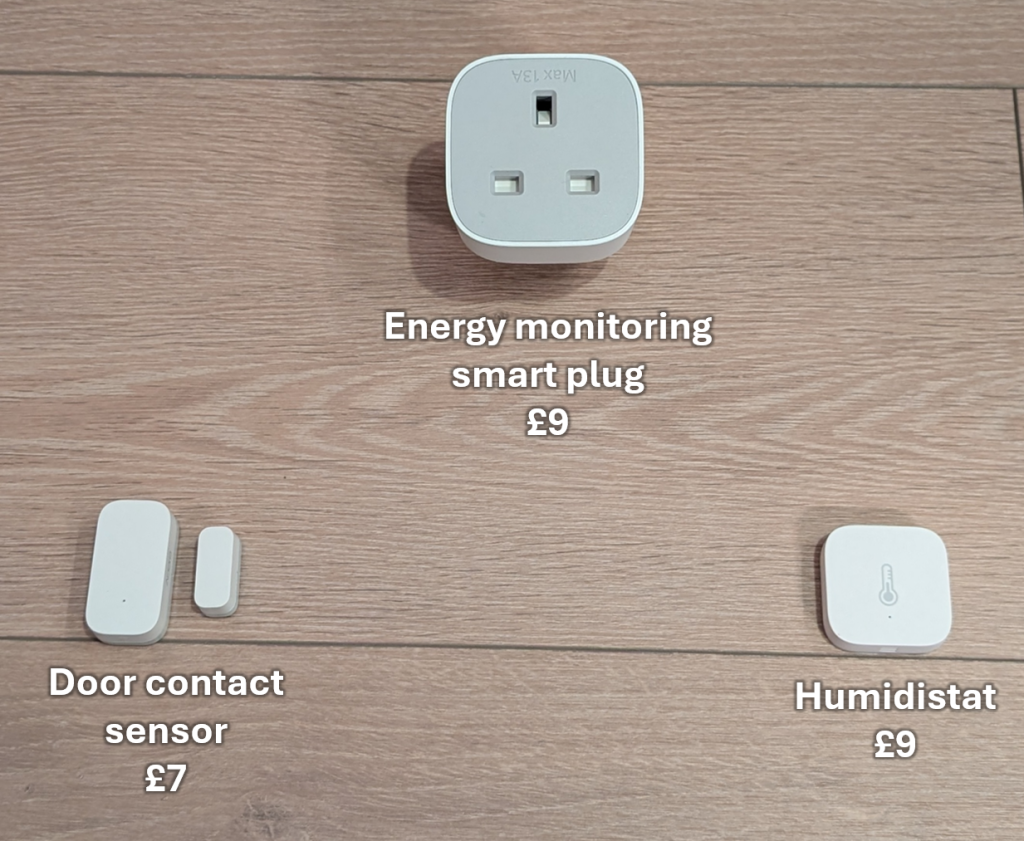
We’re going to want the following:
An energy monitoring smart plug.
A smart plug is probably unsurprising – it obviously controls switching on and off. However the energy monitoring aspect is vital since this will measure the usage and estimate the current water tank level.
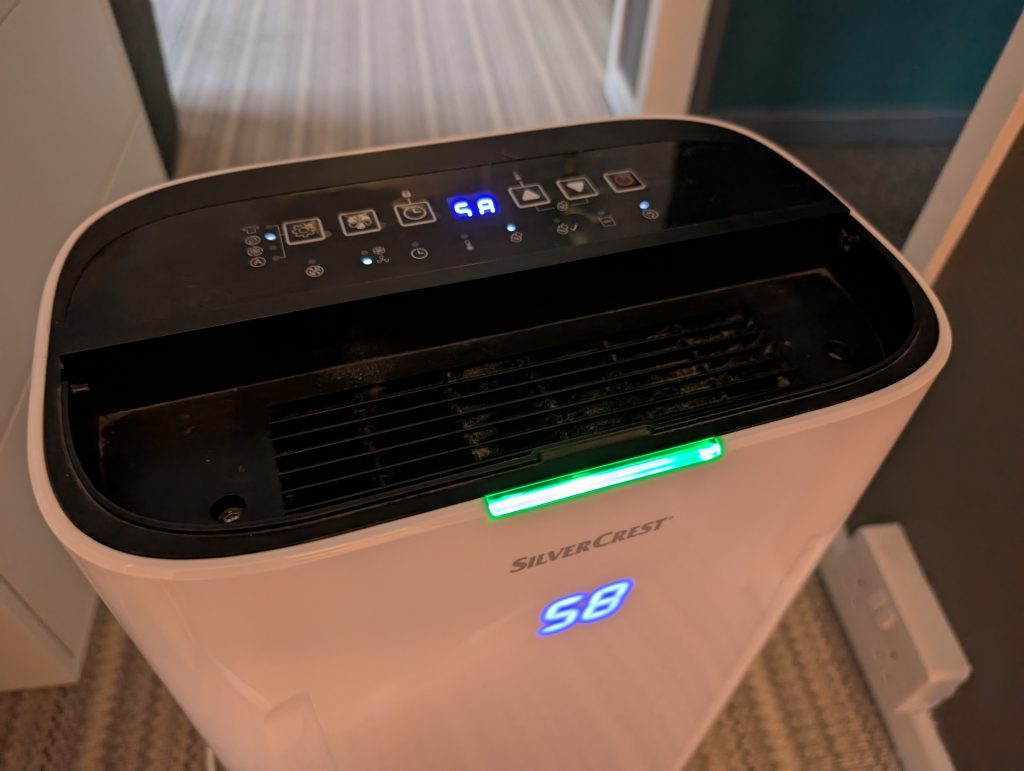
And of course… a dehumidifier. As mentioned above, ensure it returns to its previous state after being switched off and back on at the wall. We have a basic compressor model from Lidl that works great, and didn’t break the bank. But I expect this will work for virtually any model.
Control from Home Assistant
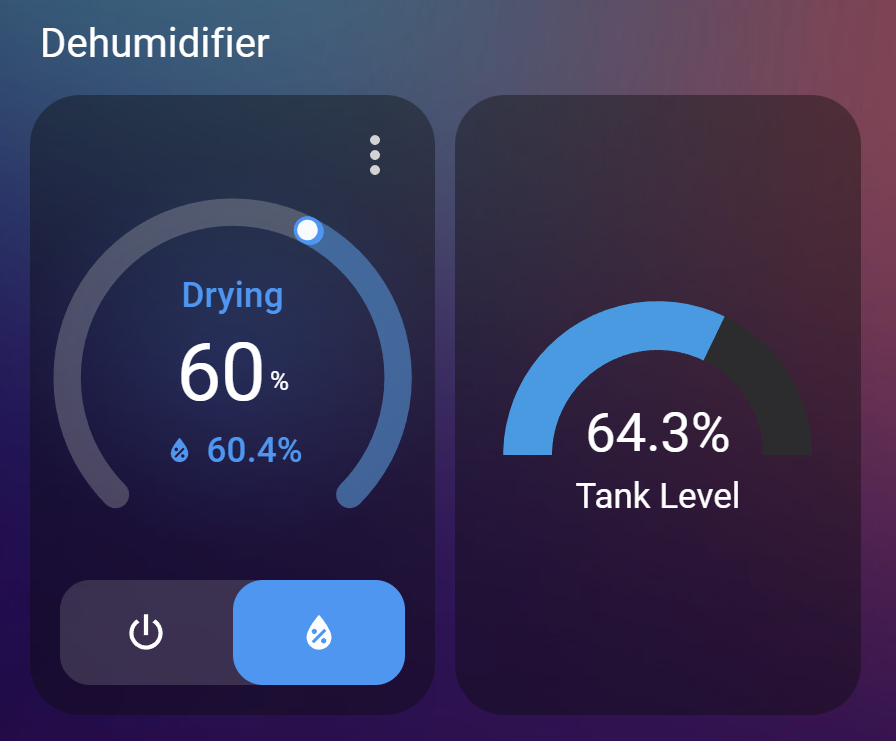
As I already had temperature sensors in each room, I opted to use the values from the nearest one to the dehumidifier – in my case, the bedroom. Once I had my smart plug connected I set up a Generic Hydrostat Helper with the following settings:
This creates a fake controllable dehumidifier from a phone or PC, with a tolerance of 2% – meaning when set to 60% for example it’ll wait till it’s 62% before turning on, and 58% before turning off, to avoid frequent on/off cycling. And as an additional precaution, you can even set a minimum cycle duration to further protect the compressor.
I set our dehumidifier in manual mode, and set the target humidity on the machine to as low as it would allow – with ours, that’s 30%. An arbitrarily low value that means all control will be done via Home Assistant.
And to stop this from turning on in the middle of the night, we added it to our existing bedtime automation for our toddler. Meaning when we press a hidden button in his room which controls bedtime lights, it now switches the new dehumidifier entity to off, and on in the morning.
Tank Monitoring – Calculation
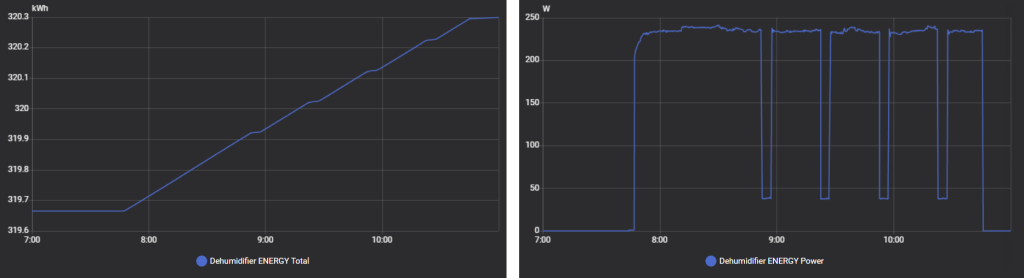
This gets a little trickier, but not too much. With the smart plug on and by default logging data, it should have added an energy entity, recording kWh. Our sits at a consistent 240W with the compressor on, meaning a steady increase in consumption.
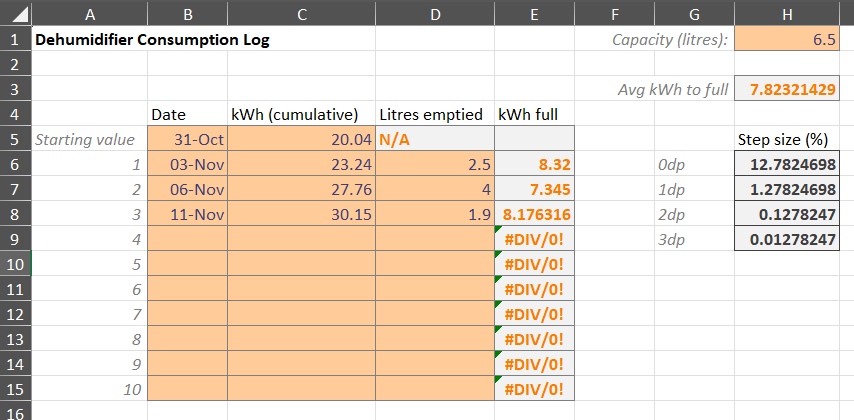
With this set up, the next few times I emptied the tank I poured it into a measuring jug, and jotted down the current kWh value. With this, given I know the tank size (6.5 litres on ours), I could work out what the total 0 to 100% energy consumption might be. I made a simple spreadsheet to calculate this – download a copy here if you like.
After emptying 3 times I noticed there wasn’t a big variance in consumption per litre – perhaps 10%. So I settled with an average of 7.82kWh per full tank. This means I could comfortably set an alert for 60% tank level without worrying about extra precision. To do this, I created an input number to hold the value – but most importantly I set a step size using my consumption value I’d calculated.
The step size is the amount I want the tank level to increase each time an increase in power is detected. As my smart plug has 3 decimal places, this means for 7.82kWh from empty to full, I can calculate that each step should be 100/7.82/1000, giving me a figure of 0.01278. If you don’t quite follow don’t worry, the spreadsheet (linked again here) gives you this too. I then chose to round this up to 0.015 for 2 reasons – it gives the total value a nicer round number, plus it gives a bit of extra headroom to stop it actually getting full.
Don’t fret about getting the step size perfect. You can always tweak the step size after you’ve finished setting up, in case you notice your tank level increasing slower or faster than reality.
Tank Monitoring – Automation
Then it was finally time to create an automation to handle the logic. I wanted a single automation that could:
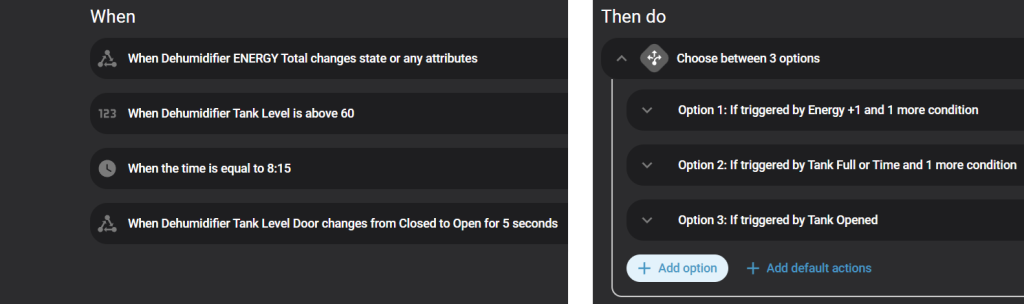
Increase the tank level value automatically.
Notify our phones when tank is full.
Reset the tank level to 0 when it is emptied.
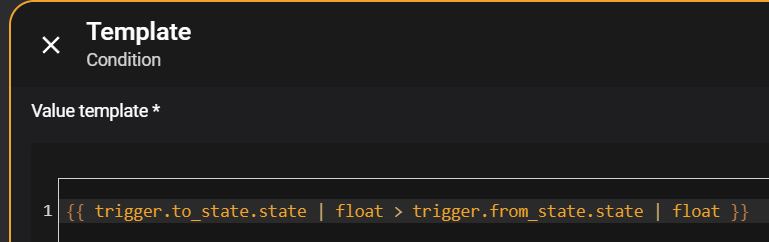
For the first one, with the step size correctly set, it’s as simple as calling an input number increment service. But then as an extra safeguard I added a template condition to ensure the new energy value had to be larger than the last – this helped avoid any erroneous increases due to other changes with the smart plug.
For the notifications, this was pretty straightforward – our phones run the Home Assistant Companion app, which exposes notification services. I went with two triggers for notifications – for the first one, immediately when the tank level is above a set value, which I opted for 60%. However, as we might not always be around to empty it, I went with a second trigger based around a time we would be much more likely to. So I went with 8:15 – immediately after nursery drop-off! And is also of course set to only notify if the tank level is above 60%.
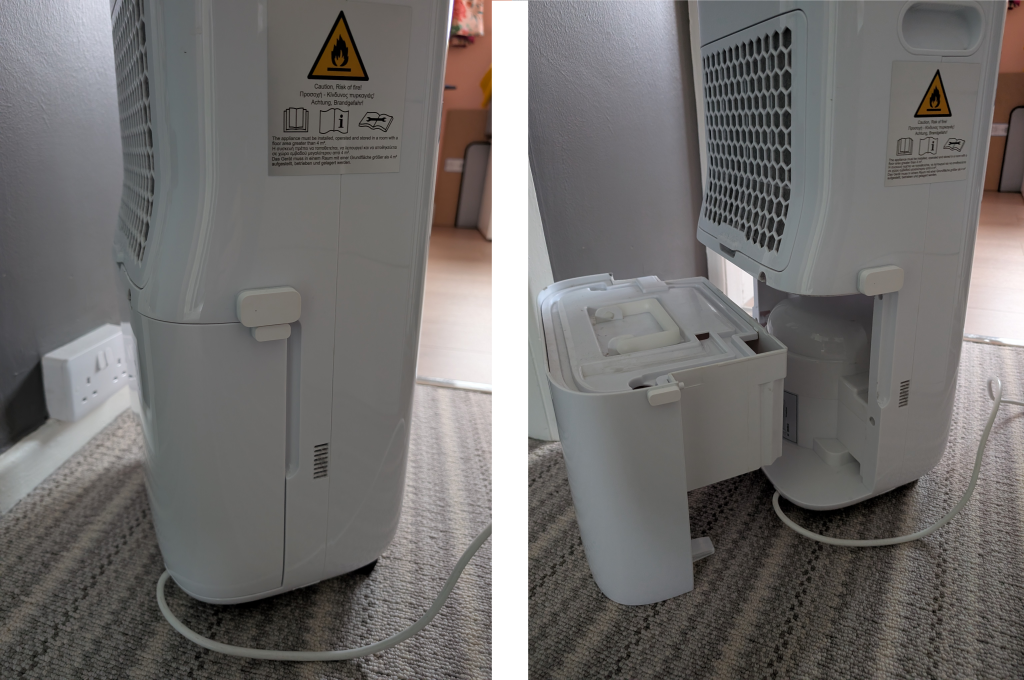
And finally, to reset our counter back to zero, this is where the door contact sensor comes in. Every dehumidifier will be different but try to find somewhere flat, unobtrusive, and away from the water flow. For us it was at the top of the tank on the side that sits against the wall.
Then for the automation, to avoid false positives I set the contact sensor trigger to only work when it has been opened for at least 5 seconds. This sets the tank level back to 0%, but also importantly sends a clear_notification message to clear any alerts – this is a good ethos to counter any notifications you send, as it avoids notification spam/fatigue, and signals that the job is done for anyone else that has received it.
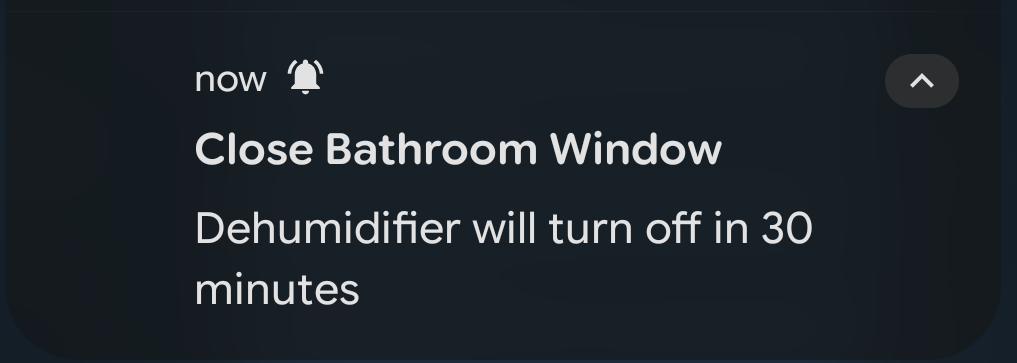
This automation was perhaps the easiest. If the bathroom window is left open for an hour, the following notification is sent:
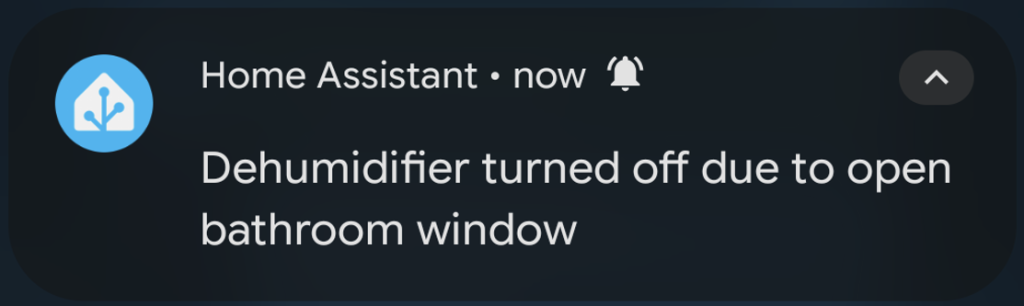
Followed 30 minutes later, unsurprisingly, with this notification and the dehumidifier switching off:
Within the next 10 minutes though, if the window is closed, the dehumidifier will automatically turn back on, to avoid having to manually turn back on.
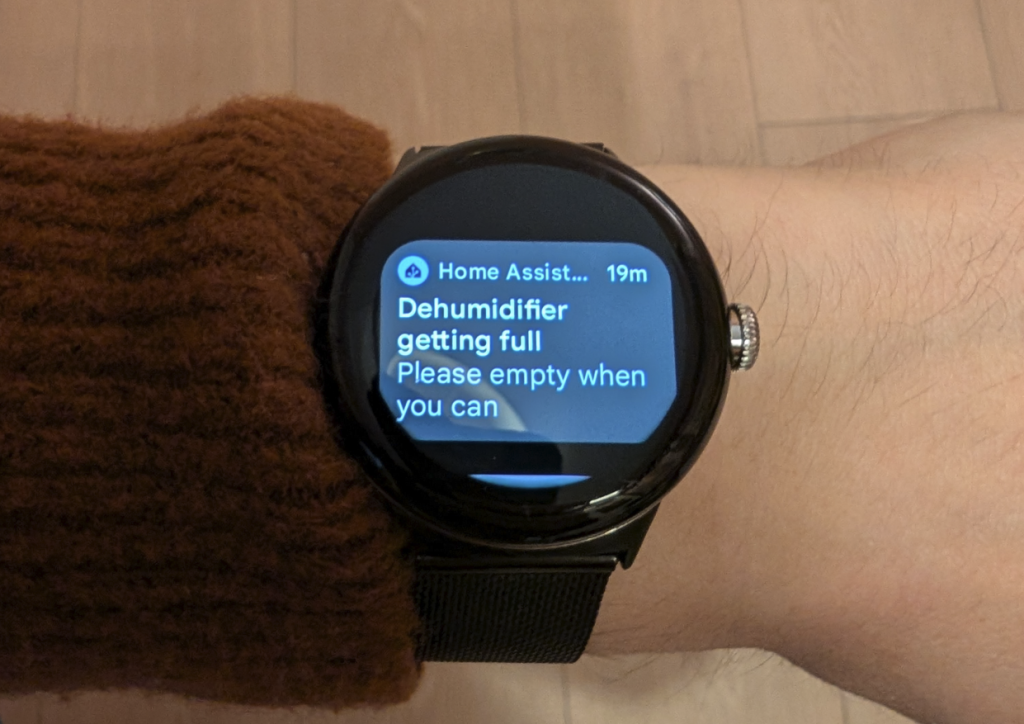
While this may seem like a lot of effort, as always it pays for itself in the long run. We’ve had this automation running virtually untouched for the last 3 years and it’s been unobtrusive, we’ve never had the tank fully fill, and it means we’ve likely saved on both running costs and condensation reduction due to it only running when it needs to. Plus, how can having this come through to your watch make you feel like you aren’t living in the future…
I had grand plans for this blog, but life got in the way as it often does. However upon recently changing jobs, my ex-colleagues have spurred me on and I shall give it a go!
The focus, although not exclusively, will be on sharing my home automation journey. It’s far too late to do that for my current home, that I began transforming in 2020, however I’m soon about to move which gives the perfect excuse to track the journey from the very beginning.
There are plenty of blogs already out there covering specific hardware, install guides etc, but what I’m hoping will set mine apart is the user experience, and clever software solutions that make such a difference to our everyday life. I’ll be sharing how our photo frame silently turns into a baby monitor when our toddler goes to bed, and I’ll be sharing how the TV pauses and then turns off when he gets too close to it. I’ll be sharing how our robot vacuums wait for us to leave before going, how I’ve saved the contents of our freezer more than once, and plenty, plenty more.
If there are any requests, key topics you’d like to hear more of, or anything I’ve touched on in the past that you’d like me to delve into, then please get in touch and let me know!
Ben
2 responses to “What this blog will (hopefully) soon become”
Matthew Lipson
Two energy requests. Can you get thinking on (1) how to nudge shorter showers. I’m looking for a primer on how to gradually turn the hot water off to encourage my two teenage daughters to reduce their shower lengths. (2) Disaggregating the electricity bill so same progeny can discover the value of turning their bedroom lights off when they go out.
Consider connecting the two so more frugal behaviour is rewarded with longer showers.
Sounds like a challenge we will face when our toddler gets bigger anyway, so sure! Already thinking about avg shower and light load, pair a motion sensor in bedroom to track when light detected but motion isn’t… add it up and start removing from a baseline of say 7 or 8 minutes, after which perhaps dad’s playlist starts increasing volume in the bathroom as incentive to get out. Watch this space!
Anyone who’s owned a Tado raditor valve will probably know that its thermometer is, well, a bit optimistic to say the least. By designing them as an all-in-one product, as soon as hot water starts flowing through your pipes the reported temperature of the valves skyrockets. It thinks that the air an inch from your boiling rad is representative of the temperature in your room. Hey genius, it isn’t. This is what mine was doing with a target temp of 23°C:
What happens is your room stays well below the target temperature, in my test case not going above 20°C. Maybe this is how they say their valves save you money? I don’t know. Your valves also constantly open and close as they warm and cool, draining precious battery and generally being a noise nuisance.
Tado have clearly realised this setup isn’t ideal and have since started offering a dedicated Wireless Temperature Sensor. Brilliant, finally, I can… wait, £70 per sensor?! On top of a £70 per room investment with valves already? No thanks guys. So I’m going to show you how to integrate any smart temperature sensor, in this case the fantastic £9 Aqara zigbee one, to your Tado system.
First, you’re going to want to set up Home Assistant. I’m not going to show you how to do this because quite frankly there are a lot of more seasoned, better explained guides out there. Essentially you’ll be running it on a standalone Raspberry Pi, a docker container on an existing machine or one of many other ways. Once set up, Home Assistant should straight away see your Tado devices on your network. Then for this example you’re going to want to give your Home Assistant server zigbee hub functionality which opens up a whole heap of compatible low power local smart sensors. Again, many ways to do this – my preference being a cc2531 USB stick paired to Zigbee2mqtt. This will allow you to connect and pair any zigbee sensor.
Xiaomi’s range of Aqara sensors cover a huge variety of use cases. There’s buttons, motion sensors, leak detectors, door sensors – you name it. For this we’ll be using their Temperature & Humidity sensor which can be picked up for around £9 from Aliexpress, or £12 from ebay for the less adventurous.
Once paired, this means Home Assistant can see both my Tado valves and Aqara sensor(s). Now let’s get them talking to each other! To do this, I’ll add a Generic Thermostat item for each room to my configuration.yaml file:
This means that my new generic thermostat, when it reaches temperature, will send Tado a target temperature of a chilly 5°C – essentially, turning off. And when the generic thermostat calls for heat it sends the maximum value Tado will allow – this is 25°C.
Already I’m seeing much more consistent and toastier temperatures in my bathroom. The valve and boiler now have more than 75% fewer heating events – not to mention the plain fact that the room is now actually getting to the temperature that it should!
Since only Home Assistant can see the correct temperature, this means all control and more importantly scheduling will be have to done through here rather than through Tado. While this is a little daunting to begin with, the benefits are plenty in that you can have properly customised heating events now. Want the living room to get warm when the TV comes on? No problem! Want the bathroom radiator to switch off when humidity spikes to signal a running shower? Go right ahead!
First, you’ll have to remove all your scheduling you might have already set up with Tado. While you’re at it, add a negative offset to your valves. Tado’s maximum allowed value is 25°C, however the valve measurement is so inaccurate that I’ve seen some rooms reported as above 30°C when in reality they weren’t even 19°C. A negative offset stops Tado from turning the valve off too early.
For scheduling you have plenty of options such as a time-based simple Automation, however for my example I will show my NodeRed flow. With this, I have been able to simulate pre-heat (turns on earlier when room is cooler), weekend/weekday split, frost stat and plenty of other features.
You can import the above nodes by copy and pasting the code below to NodeRed:
The flows work primarily with a number of timers seen on the left. At each specified time, a flow begins which first asks whether the global heating setting is off. This is optional but recommended, and is a custom input boolean added as follows to the configuration.yaml:
If this is off, then the pseudo ‘frost stat’ (or FS) is called. This is a call service node with a suitably low temperature set within data:
If this is set to on, a weekday node sends it to either set of timed ranges. For most of these they simply follow the above frost stat example of calling a specific temperature. This differs however with the top node, which calls a custom function. This function is designed to provide a gradual increase in target temperature at the start of a heating event, meaning the heating will switch on earlier when needed. Then, as soon as heating switches on, it changes the target temperature to its maximum. This is to avoid the room temperature being able to catch up to the target temperature, leading to unecessary on/off events.
The code behind this node is as follows. Note the 5 variables hardcoded at the beginning – this provides the function with the room, start temp, end temp, start time and end time.
const globalHomeAssistant = global.get('homeassistant');
var today = new Date();
var time = today.getHours() + today.getMinutes() / 60;

var room = "climate.bathroom_2"
var u1 = 12;
var u2 = 19;
var t1 = 4;
var t2 = 7;

var temp = u1 + ((time - t1)*(u2-u1))/(t2 - t1)
var heat = globalHomeAssistant.homeAssistant.states[room].attributes.hvac_action;
var newMsg = { payload: {} };
if (heat == 'heating') {
    newMsg.payload = u2
}
else {
    newMsg.payload = Math.round(Math.min(temp, u2)*2)/2
}
return newMsg;
Because this replaces the message’s payload, the next node can then set the temperature to the value of payload:
By now, I have a rich powerful customisable template for one room than can easily be copy and pasted for another. The test case of my bathroom was so successful that I’ve used this setup in another 6 rooms in my home, which have been running successfully for over a year giving it a true all-season test.
Finally, to allow a bit of quick overriding and monitoring for my rooms I have utilised the amazing Button Card addon to easily show all of my rooms on my Home Assistant dashboard. This shows current and target temperatures, lights up red when a room is heating, and utilises the adorable Material Design Icons (code for bathroom given below).
I really hope even some of these steps come in useful to those of you that might already have Tado and feel frustrated by its limitations. As with all cloud-based services, it worries me that one day Tado will no longer support my devices or will turn off the API, since every time a Tado heating event is sent this has to travel through Tado’s cloud service. However, when this day comes the migration from Tado will be much easier now that the majority of heating events are controlled by Home Assistant – simply find one of the many other radiator valves supported by Home Assistant and update your switches to send values to this instead of Tado.
I’d love to hear your comments if you’ve found this useful, or if there are any items I have overlooked that would make the process simpler or better (for which I expect there will be many!).
Ben
2 responses to “Using Home Assistant to integrate 3rd party sensors with your Tado valves”
timdonovanuk
Interestingly, we both arrived at the same solution independently 🙂
I’ve been looking at the Tado core component, as I feel the ability to select an external source for the temp sensor would make sense there. The code is spaghetti though.
My only concern about this approach is Tado actually has 3 settings when warming your room, low, med, high – i.e. if the room only needs a bit of heat, it’ll only open the valve a bit. With our solution I think you end up with high applied at all times. Not sure what this means regarding wearing out the boiler quicker.
The important part here is the sending of a target temperature to the tado.set_climate_timer service. What I’m doing here is calculating the target temp based on the difference between what Tado thinks it is, and what the external sensor thinks it is. I.e. if Tado thinks it’s 22 degrees, and the external sensor thinks its 20 degrees, and the target temp is 21 degrees, it’ll tell Tado to raise the temp to 23 degrees. keep_alive is needed to continually reassess this maths.
I think this works well, and will ensure Tado only raises the valve to low/med/high when needed, rather than setting it to 25+ every time on full blast.




Leave a Reply